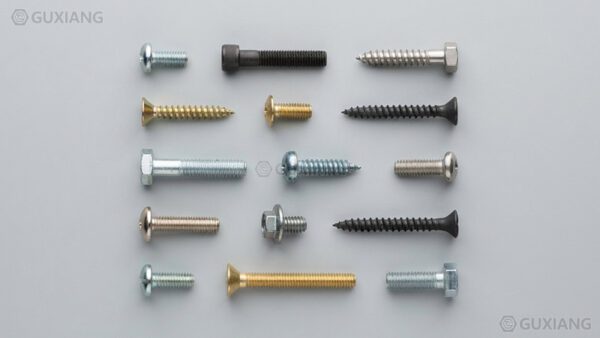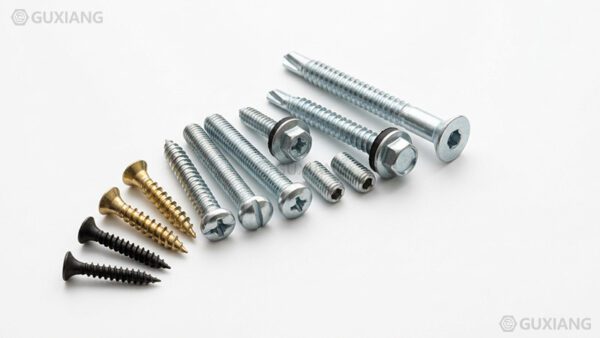






A drywall screw is a hardened, self-tapping fastener engineered to attach gypsum board to wood or steel framing, distinguished by a bugle head, a sharp needle point, a dual-thread geometry, and a black phosphate finish. Unlike a common wood screw, a drywall screw sinks its head flush with the paper surface without pre-drilling, cuts its own mating thread as it drives, and does it fast enough for production framing crews to hang hundreds of boards per day. Unlike a generic self-tapping screw, a drywall screw is tuned to a narrow job: thin gypsum panels, light-gauge metal or soft wood studs, and a defined drive depth that stops just below the paper face. The difference matters because the wrong screw either tears the paper, strips the stud, or rusts through the paint six months after the job. This guide covers the anatomy, coatings, thread options, sizes, applications, and failure modes of drywall screws, with the specification detail engineers and procurement teams need to match the right screw to the framing system.
What Are Drywall Screws
A drywall screw is a production fastener for attaching gypsum board (drywall, sheetrock, plasterboard) to wood studs, steel studs, metal furring, and gypsum panels in framed assemblies. It belongs to the self-tapping screw family: the sharp point pierces the paper and board core, the thread cuts or forms a matching thread in the stud material, and the bugle head seats into the board without a separate countersinking step.
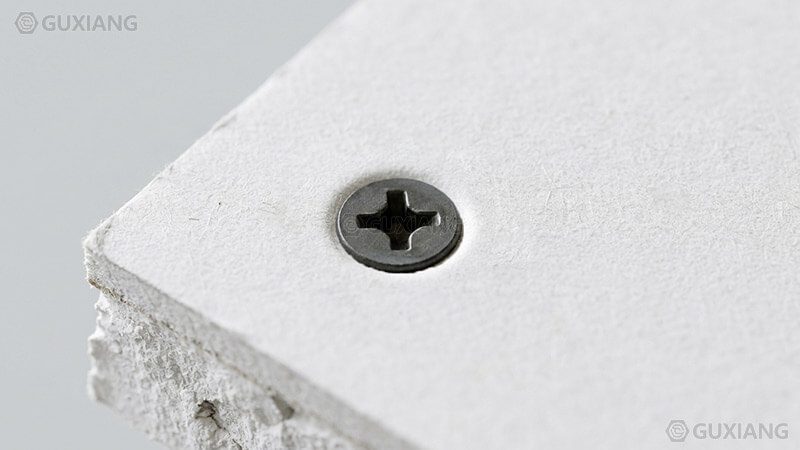
Three features separate a drywall screw from a general-purpose wood screw. First, the head is a bugle profile, a concave countersink shape that pulls the head below the board surface as it seats, leaving a dimple instead of a protruding cap. Second, the thread runs in a double-lead pattern on many sizes, so the screw advances roughly twice as fast per revolution, cutting crew time on repetitive fastening. Third, the point is a sharp needle or gimlet point that starts instantly on paper, softwood, and light-gauge steel without a pilot hole. The body is typically a carbon steel blank that is heat-treated and carburized to a hard case, so the thread resists stripping while the core keeps enough toughness to survive driving at high speed.
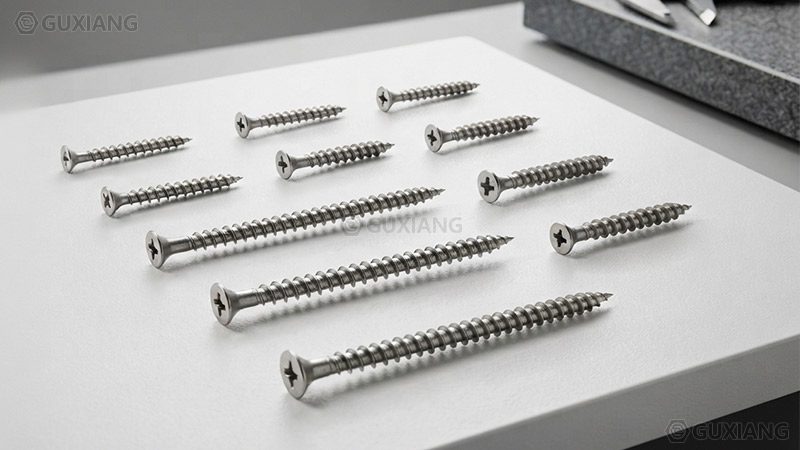
Drywall screws are covered by specification families that buyers should recognize. ASTM C954 defines steel drill screws for fastening gypsum panel products to steel framing members, and ASTM C1002 defines steel self-piercing tapping screws for the same duty; both set requirements for case hardness, thread form, point geometry, and coating. ASME B18.6.3 covers the general inch-series machine and tapping screw dimensional system into which drywall screw diameters, threads, and points fit. The complete fastener standards landscape explains where each document sits, while the broader types of screws guide places drywall screws inside the full screw taxonomy.
Anatomy of a Drywall Screw
Every drywall screw works the same way mechanically: a driver bit engages the recess, torque spins the screw, the point pierces the board, the thread pulls the body through the gypsum core, and the head embeds into the paper. The five zones below carry the performance.
| Zone | Geometry | Function |
|---|---|---|
| Head | Bugle profile, concave underside, Phillips or square recess | Countersinks flush below the paper, spreads bearing load, accepts a power driver bit |
| Drive | Phillips #2 most common; square and Torx available | Transfers torque from the screw gun; limits cam-out during high-speed driving |
| Thread | Double-lead, sharp-edged, coarse or fine pitch by type | Cuts or forms a thread in the stud, pulls the board tight, controls pull-out resistance |
| Point | Sharp needle or gimlet point | Pierces paper and gypsum core without pre-drilling; starts on steel up to about 25 gauge |
| Finish | Black phosphate, zinc, epoxy, or stainless | Sets corrosion resistance, lubricity during drive, and compatibility with fire-rated or damp assemblies |
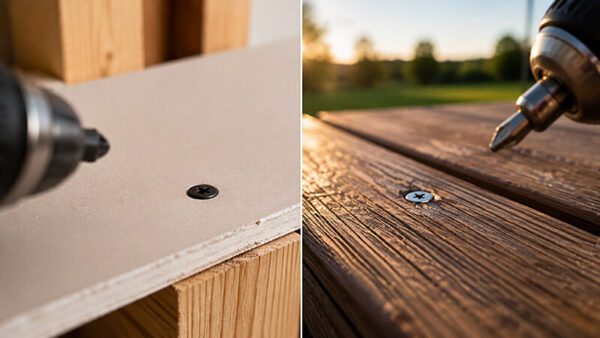
The bugle head deserves extra attention because it is the reason drywall crews do not countersink. The underside is a smooth concave curve that transitions into the shank, so the head displaces gypsum as it seats and stops with the top surface just below the paper face. Drive it one turn too far and the paper tears; leave it proud and the taped joint bulges. The recess is almost always Phillips #2 on North American drywall screws, which matches the standard collated screw-gun bit; the screw head types reference covers how recess and head geometry interact.
The thread design differs by framing material, and the two variants are so standardized that they have common names: type W (wood, coarse thread) and type S (steel, fine thread). Both use a sharp, high-angled thread flank that cuts rather than displaces, which keeps driving torque low in gypsum. The double-lead geometry advances the screw about two thread pitches per revolution, which cuts insertion time on long ceiling runs. The point on type S screws is ground to pierce light-gauge steel, while type W points are tuned for softwood start-up without splitting thin panel edges.
Coating Options for Drywall Screws
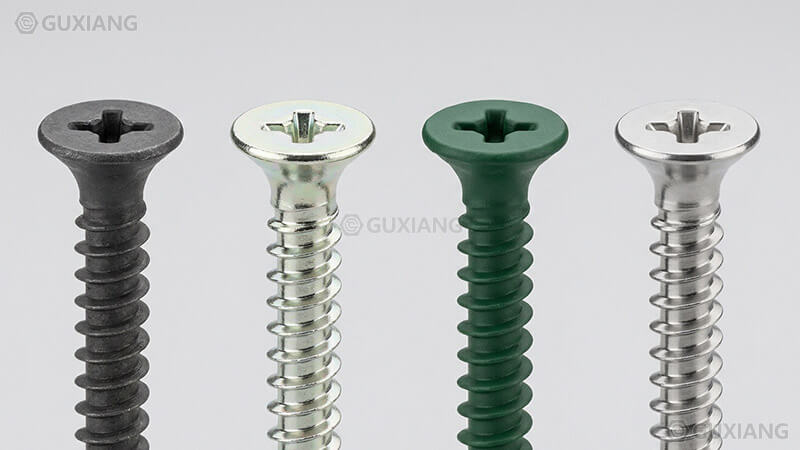
The coating is the first line of defense against rust in a wall assembly, and it also controls drive friction and galvanic behavior against the framing. Drywall screws ship in four main finish families.
Phosphate Black Coating
Black phosphate is the default drywall screw finish. A zinc or manganese phosphate conversion coating is applied to the hardened steel surface, producing a matte black or dark grey layer that holds the screw’s lubrication and resists mild indoor humidity. The coating is thin (about 0.2 to 0.5 mil), so it is not a corrosion barrier for wet service; its real jobs are anti-glare appearance, consistent drive torque, and compatibility with joint compound. Phosphate black screws are the correct choice for standard interior gypsum board in dry, climate-controlled buildings. Salt spray resistance under ASTM B117 conditions typically ranges from 24 to 72 hours before red rust appears, which is why phosphate screws are never specified for bathrooms, kitchens, or exterior walls.
Zinc Electroplated Coating
Clear or yellow zinc electroplating adds a metallic sacrificial layer over the steel, roughly 5 to 12 microns thick depending on the class. Salt spray performance climbs to about 72 to 120 hours to first corrosion, and the finish survives the higher humidity found in garages, utility rooms, and semi-conditioned spaces. Zinc-plated drywall screws cost a little more than phosphate and are common on renovation stock where the wall cavity may see occasional moisture. The zinc plating deep dive explains thickness classes and corrosion mechanisms, and the galvanized vs zinc plated fasteners comparison covers when hot-dip galvanizing becomes necessary.
Epoxy and Polymer Coated
Epoxy or painted drywall screws carry a thicker organic layer, often green, white, or black, that isolates the steel from moisture and from direct galvanic contact with treated lumber or dissimilar metals. Salt spray resistance jumps to 500 hours or more, and the coating minimizes rust bleed-through on painted surfaces. Epoxy-coated screws are the standard pick for treated-wood framing, humid coastal interiors, and ceilings above showers where a phosphate screw would corrode in a few years. The trade-off is cost and slightly higher drive torque, plus a thicker head profile that demands careful depth control.
Stainless Steel
304 and 316 stainless drywall screws eliminate corrosion almost entirely, with 316 recommended for saltwater coastal zones, pools, and food-processing walls. Stainless screws cost several times more than coated carbon steel, so they are reserved for wet or corrosive assemblies where coating failure is unacceptable. The stainless steel fastener grades guide sorts the alloy choices, while the carbon steel fasteners guide explains why coated carbon steel still dominates interior work on price and drive behavior.
| Coating | Typical salt spray (ASTM B117) | Best service | Relative cost |
|---|---|---|---|
| Phosphate black | 24–72 h | Interior dry assemblies | $ |
| Zinc electroplated | 72–120 h | Garages, semi-conditioned spaces | $$ |
| Epoxy / polymer | 500+ h | Treated lumber, humid interiors | $$$ |
| Stainless 304 | 500–1000+ h | Coastal, food plants | $$$$ |
| Stainless 316 | 1000+ h | Saltwater, pools, chemical washdown | $$$$$ |
Thread Geometry: Coarse vs Fine
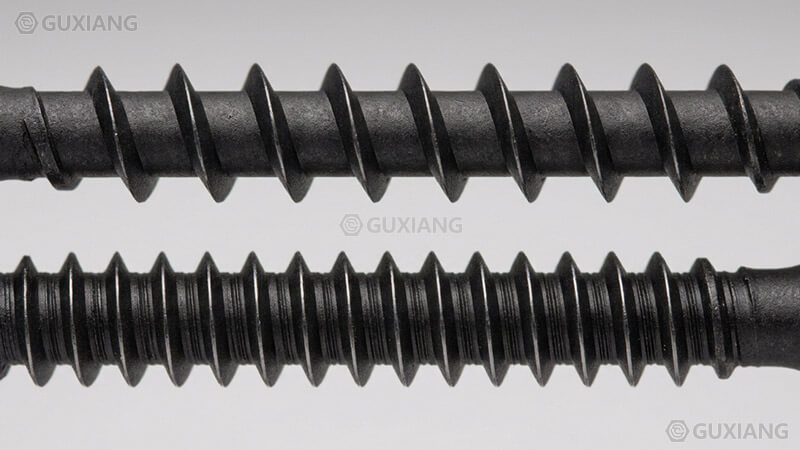
Drywall screw thread pitch is matched to the stud material, and mixing the two is the most common field mistake. The coarse-thread type W screw engages softwood studs with a deep, aggressive flank that pulls strong holding values out of low-density framing. The fine-thread type S screw uses a tighter pitch that packs more thread turns into the thin wall of a steel stud, preventing the screw from stripping out of 25 to 20 gauge metal. A coarse screw driven into a steel stud tears the thin wall and loses most of its holding power; a fine screw driven into wood pulls a smaller bite and can loosen under vibration.
| Property | Coarse thread (type W) | Fine thread (type S) |
|---|---|---|
| Framing target | Wood studs, OSB, plywood | Steel studs, metal furring, track |
| Pitch | ~9–11 threads per inch typical | ~16–20 threads per inch typical |
| Holding mechanism | Deep bite in softwood fibers | Many turns engaged in thin metal |
| Start behavior | Easy in softwood, can split thin edges | Pierces light-gauge steel cleanly |
| Common misuse result | Strips thin steel studs | Loosens in wood under load |
The visual rule of thumb: coarse drywall screws have visibly wider thread spacing and a sharper, deeper flank; fine screws look densely threaded and often have a more acute point. When a project uses mixed framing, the correct approach is to order both types and label them by stud material, because the threads are not interchangeable. The drywall screws vs deck screws comparison shows how thread geometry changes when the fastener moves from gypsum to exposed decking service.
Sizes and Dimensions
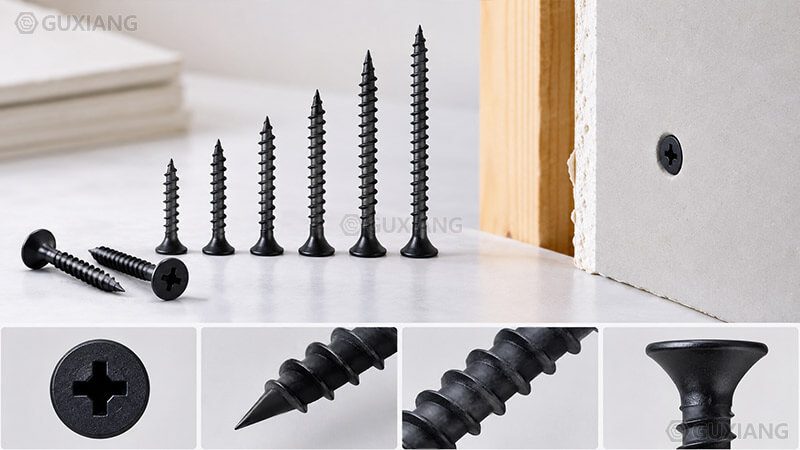
Drywall screws are specified by gauge (diameter) and length. The three workhorse gauges are #6, #8, and #10, with #8 dominating residential and commercial framing.
| Screw | Diameter | Common lengths | Typical duty |
|---|---|---|---|
| #6 | 0.138 in (3.5 mm) | 1 in, 1-1/4 in | 1/2 in board to wood or steel studs, light duty |
| #8 | 0.164 in (4.2 mm) | 1-1/4, 1-5/8, 2, 2-1/2, 3 in | Standard board, ceilings, double layer |
| #10 | 0.190 in (4.8 mm) | 2, 3 in | Heavy panels, furring, metal lath |
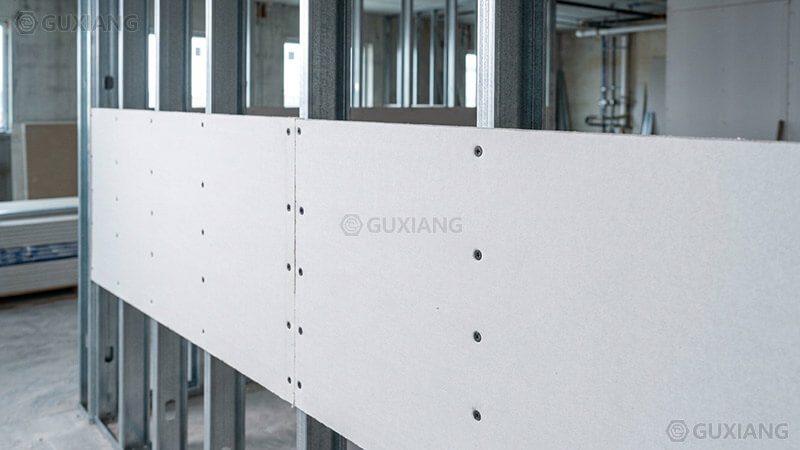
Length selection follows a simple rule: the screw must penetrate the board and embed at least 3/4 inch into a wood stud or at least 3/8 inch through a steel stud and its track. For 1/2-inch drywall on wood studs, a 1-1/4 inch screw works; for 5/8-inch Type X board on steel studs, a 1-inch fine-thread screw embeds correctly; for double-layer board, step up to 1-5/8 or 2 inches. Edge and field spacing follows the framing code: screws sit 6 to 8 inches apart on board edges, 12 inches apart in the field for walls, and 12 inches on edges with 12-inch field spacing on ceilings, with every screw located at least 3/8 inch from the panel edge to prevent paper tear-out.
Pull-out capacity depends on gauge, embedment, and stud density. A #8 coarse screw embedded 3/4 inch in spruce framing typically resists roughly 90 to 120 pounds of direct pull-out; the same screw in steel studs depends on how many thread turns engage the metal and typically delivers 60 to 90 pounds per screw in 25-gauge track. These values drive the 12-inch field spacing rule: at 12 inches on center, each square foot of 1/2-inch board is held by about one screw, and the joint system carries the rest. When a ceiling carries heavier panels or acoustic loads, move to #8 x 1-5/8 screws and 12-inch spacing in both directions.
The correct pilot hole sizes for wood screws matter in one drywall edge case: when a screw lands within 1 inch of a stud end or a cut board edge in hardwood, a small pilot hole prevents splitting. Standard drywall installation does not pre-drill, because the needle point and thread geometry are tuned to start without one.
Application Scenarios
Drywall screws show up in every framed gypsum assembly, but the correct type changes with the substrate and service condition.
Gypsum board to wood studs. Coarse-thread type W screws, #8 x 1-1/4 inch for single layer or #8 x 1-5/8 inch for double layer, driven 16 or 24 inches on center into dimension lumber. This is the default residential wall and ceiling detail.
Gypsum board to steel studs. Fine-thread type S screws, #8 x 1 inch for 1/2-inch board and #8 x 1-1/4 inch for 5/8-inch board, into 25 to 20 gauge steel track and studs. The screw point pierces the metal and the fine thread engages the thin wall; ASTM C954 and C1002 govern the joint.
Ceilings and overhead assemblies. Ceilings demand longer screws and tighter spacing because gravity adds a direct shear load to every fastener. Use #8 or #10 screws with at least 3/4 inch embedment, and follow the ceiling spacing schedule of 12 inches on center in the field. Overhead work also punishes stripped or under-embedded screws, so crews set the screw-gun depth nose and check the first dozen screws on every new coil.
Metal furring and lath. Fine-thread screws attach gypsum board or metal lath to furring channels and hat channels over masonry. The screw must not protrude past the far side of the channel, so length is chosen by channel gauge plus board thickness.
Fire-rated assemblies. Type X and Type C gypsum boards in rated walls use the exact screw spacing and length from the assembly listing, often 8 inches on center on edges and 8 inches in the field, with a specific screw count per board. Never substitute phosphate for coated screws in a rated assembly without checking the listing, because the coating and head geometry are part of the tested system.
Moisture and treated-lumber areas. Green board in bathrooms, epoxy-coated screws with treated studs, and stainless screws within 10 miles of salt spray are the practical boundaries. A phosphate screw in a shower wall rusts through the tile backer within two to three years.
Acoustic and partition systems. Sound-rated partitions use the same drywall screws as fire-rated walls but add sealant and resilient channel details; screw spacing stays per the assembly listing, and every screw must land in the stud or track. Missing screws in a rated partition reduce both sound isolation and structural continuity, so collated coils with fixed spacing markings help crews stay consistent.
The metric bolt torque chart and torque guidance in the standards guide matter here in one specific way: drywall screws are installed by depth, not by torque, but the torque ceiling of the driver sets the practical limit on what gauge a crew can run without cam-out.
Drywall Screws vs Wood Screws vs Self-Tapping Screws
| Property | Drywall screw | Wood screw | Generic self-tapping screw |
|---|---|---|---|
| Head | Bugle, self-countersinking | Flat, pan, or oval; needs countersinking | Pan, flat, hex, varies |
| Thread | Double-lead, coarse or fine by stud type | Single-lead, aggressive wood thread | Uniform machine thread with cutting flute |
| Point | Needle point, no pre-drill | Tapered gimlet or auger point | Cutting or forming point by type |
| Coating | Phosphate, zinc, epoxy, stainless | Zinc, stainless, ceramic, coated | Zinc, black oxide, stainless |
| Substrate | Gypsum to wood or steel studs | Wood, engineered lumber, composites | Sheet metal, plastic, light steel |
| Pre-drill | No | Often recommended in hardwood | Type AB/A no; thread-forming may need hole |
| Typical cost | Low, production volumes | Low to medium | Low to medium |
The practical translation: a drywall screw is a specialized self-tapping screw for gypsum framing, a wood screw is a general wood fastener that needs countersinking and often a pilot hole, and a generic self-tapping screw is a metal-to-metal or metal-to-plastic worker with a cutting point. Using a drywall screw as a general wood screw works poorly because the bugle head tears and the thread is tuned for soft gypsum-facing service; using a wood screw in drywall leaves proud heads that break the tape. The full types of screws and head and drive comparisons in the series cover the rest of the taxonomy when a project moves beyond gypsum.
Installation Practice
Installation quality decides whether a wall stays flat and crack-free. Four variables dominate: driver type, bit condition, depth control, and spacing discipline.
Driver and speed. Collated drywall screw guns feed screws from a magazine and drive at a fixed, depth-limited stroke; a variable-speed drill works for small jobs but must be run at reduced speed, roughly 2000 to 3000 rpm, so the screw does not over-advance past the paper. Set the depth nose so the head seats to a shallow dimple, about 1/32 inch below the surface, without breaking the paper face.
Bit condition and fit. Use a sharp Phillips #2 bit that seats fully in the recess. A worn bit cams out, rounds the recess, and strips the screw head; a mismatched bit does the same in seconds at 3000 rpm. Replace bits every few coils on production work, and check the first joint of every new box of screws for cam-out before running a full wall.
Dimple depth. Drive until the head sits just below the paper surface, leaving a smooth dimple. Overdriving tears the paper and crushes the gypsum core, killing the head’s bearing value; underdriving leaves the head proud, which the joint compound cannot cover without a bulge.
Spacing and edge distance. Keep screws 6 to 8 inches on center along panel edges, 12 inches in the field on walls, and 12 inches on edges and in the field on ceilings. Every screw sits at least 3/8 inch from the panel edge and 2 inches from stud ends. Stagger screws across adjoining panels instead of stacking them at the joint.
Fastener selection by framing. Confirm thread type matches the stud: coarse for wood, fine for steel. On mixed framing jobs, sort screws by type at the coil and color-code the boxes; a single mis-threaded coil on a steel-stud job strips dozens of studs before anyone notices.
Torque and depth discipline. The screw gun’s depth stop, not the drill’s clutch, controls final seating. When using a conventional drill, set the clutch to a low slip point and finish the dimple by hand-feel, because a drywall screw has no built-in torque signature. The metric bolt torque chart and fastener torque tables in the series explain the general principle that fasteners in brittle substrates are depth-controlled, not torque-controlled.
FAQ
What are drywall screws used for?
A: Drywall screws attach gypsum board to wood or steel studs, metal furring, and gypsum panels. The bugle head seats flush, and the sharp point starts without pre-drilling.
What is the difference between coarse and fine thread drywall screws?
A: Coarse thread screws suit wood studs with a deep bite. Fine thread screws suit steel studs, engaging thin metal walls. Mixing them strips or loosens the fastener.
Can drywall screws be used in wood?
A: Yes, with coarse thread screws in softwood studs. Embed at least 3/4 inch. Do not use fine thread type S screws in wood, because holding power drops sharply.
Why are drywall screws black?
A: The black finish is a phosphate conversion coating. It adds corrosion resistance for interior use, reduces drive friction, and keeps a consistent appearance under joint compound.
What size drywall screw do I need for 1/2-inch drywall?
A: Use #8 x 1-1/4 inch coarse thread for wood studs, or #8 x 1 inch fine thread for steel studs. The screw must embed 3/4 inch in wood.
Do drywall screws need a pilot hole?
A: Normally no. The needle point starts on paper and gypsum instantly. Drill a pilot only near board edges or hardwood, where splitting is possible.
Can I use drywall screws for outdoor projects?
A: No, unless they are stainless or epoxy-coated. Standard phosphate drywall screws corrode quickly outdoors. Use coated deck or exterior screws instead.
What is the difference between drywall screws and deck screws?
A: Drywall screws have a bugle head, needle point, and fine or coarse gypsum thread. Deck screws have larger heads, corrosion coatings, and wood thread for exposed service.
Why do drywall screws pop out?
A: Screws pop when lumber shrinks, studs are warped, or the board was not pulled tight. Prevent by proper embedment and screw placement away from stud edges.
How far apart should drywall screws be spaced?
A: Space screws 6 to 8 inches on edges and 12 inches in the field for walls. Ceilings use 12 inches on edges and in the field, or per assembly listing.
References
ISO 898-1:2013, Mechanical Properties of Fasteners Made of Carbon Steel and Alloy Steel — Part 1: Bolts, Screws and Studs with Specified Property Classes. https://www.iso.org/standard/60696.html
ASTM C954-18, Standard Specification for Steel Drill Screws for the Application of Gypsum Panel Products or Metal Plates to Steel Framing Members. https://www.astm.org/c0954-18.html
ASTM C1002-22, Standard Specification for Steel Self-Piercing Tapping Screws for the Application of Gypsum Panel Products or Metal Plates. https://www.astm.org/c1002-22.html
ASME, Codes & Standards — Fastener and Screw Thread Standards (B18 series). https://www.asme.org/codes-standards
Oberg, E., et al., Machinery’s Handbook, Industrial Press. https://www.industrialpress.com/
USG Corporation, Gypsum Construction Handbook. https://www.usg.com/
National Gypsum, Technical Documents and Installation Guides. https://www.nationalgypsum.com/